Using Neo4j with Rails 3.2


Neo4j is a NoSQL graph database written in Java. This means that you work with nodes and relationships rather than fixed tables with a schema. Nodes can easily be mapped to Ruby object and relationships seen as references to other objects. This article will show how to utilize Neo4j to build a simple blog application. While this is not a typical application for a graph database it will show how the database can be used in conjunction with Rails.
Prerequisites
The neo4j gem we will be using in this article requires JRuby. If you are using RVM you can install JRuby by typing rvm install jruby. Make sure you have at least JRuby 1.6.2 installed, otherwise Rails will not work properly.
You can then switch to JRuby by using rvm use:
rvm use jruby
To check if everything worked as expected type ruby -v which should return a message like the following:
$ ruby -v
jruby 1.6.7.2 (ruby-1.8.7-p357) (2012-05-01 26e08ba) (Java HotSpot(TM) 64-Bit Server VM 1.7.0_05) [linux-amd64-java]
As you can see, JRuby 1.6 is compatible with Ruby 1.8.7. If you want to make use of the latest features in Ruby 1.9 you need to upgrade to JRuby 1.7 which is, at the time of this writing only available as a preview version.
Generate a Rails Application
Now that everything is set up we can create a new Rails project which we will name 'neo_blog'.
gem install rails
rails new neo_blog -m http://andreasronge.github.com/rails3.rb -O
cd neo_blog
bundle
Note: The -O option skips ActiveRecord which we do not need as all functionality for database handling is provided by the neo4j gem.
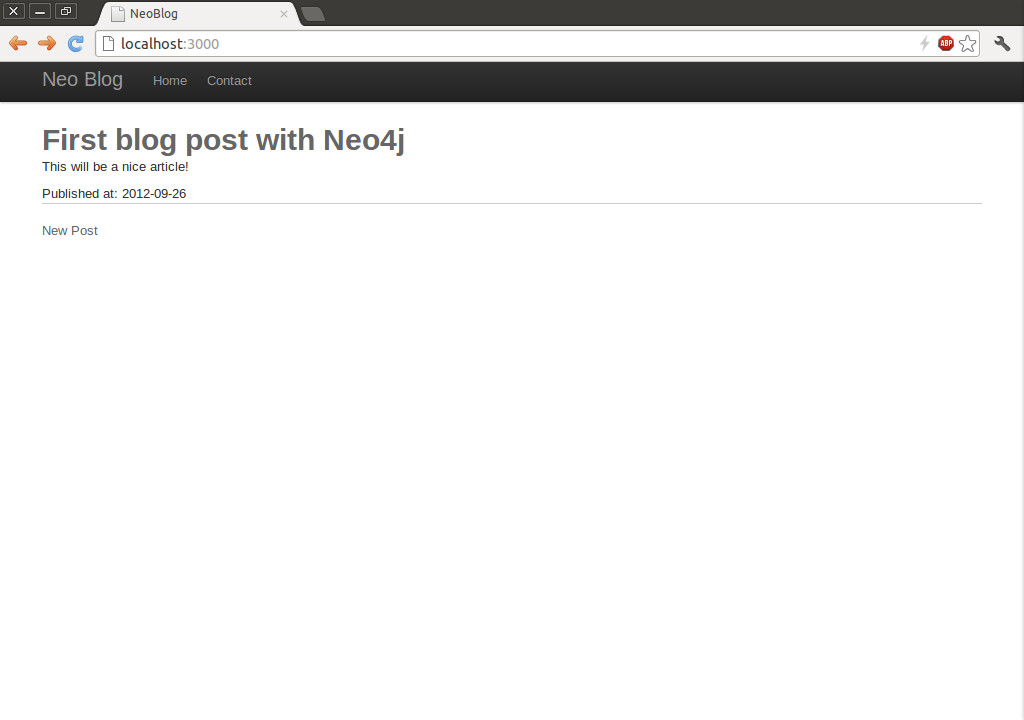
Creating a blog
We can now use the standard generators of Rails. For a blog application we will need a Post model, a controller and views: A perfect job for the scaffold generator.
rails generate scaffold Post title description content:text published_at:date
This creates several files. The most interesting is the new post model which inherits from Neo4j::Rails::Model. Also note that there are no migration you have to run as Neo4j is schema-less.
class Post < Neo4j::Rails::Model
  property :title, :type => String
  property :description, :type => String
  property :content, :type => String
  property :published_at, :type => Date
end
We should then configure the routes to default to the post controller and delete public/index.html
root :to => 'posts#index'
Adding comments
A blog certainly cannot live without users being able to comment on your posts. We need to add another resource to our project:
rails generate scaffold comment author email content:text
We now have a comment model that we need to associate with our post model. Neo4j provides Neo4j::Rails::Relationship to handle relationships between Neo4j nodes. Neo4j::Rails::Relationship is ActiveModel compatible and implements some ActiveRecord methods, which means you can run validations on it.
Relationships are handled a bit differently than in ActiveRecord. The has_n and has_one class methods generate convenience methods for creating and traversing nodes. However they should not be confused with has_many or has_one! Both has_n and has_one assume relationships to the same class and not to different classes.
As we want to create a relationship from Post to Comment we need to specifically tell Neo4j to create the relationship from posts to comments. The .to methods accepts a class as parameter and defines which class is referenced.
class Post < Neo4j::Rails::Model
  has_n(:comments).to(Comment)
end
With that line in the post model we can easily add new comments to a post. You can try the following on the rails console (rails c)
p = Post.first
c = Comment.create(:content => "Nice post!")
p.comments << c
Now in order to associate comments to a post we need to change the create action of the comments controller.
def create
    @post = Post.find(params[:id])
    @comment = @post.comments.build(params[:comment])
    [..]
end
From there you can go ahead an customize the views and CSS to style the blog. JetStrap, a recently released interface-builder for Twitter Bootstrap, makes it easy to create good looking web interfaces. Also have a look at the Github Project of the blog we build here.
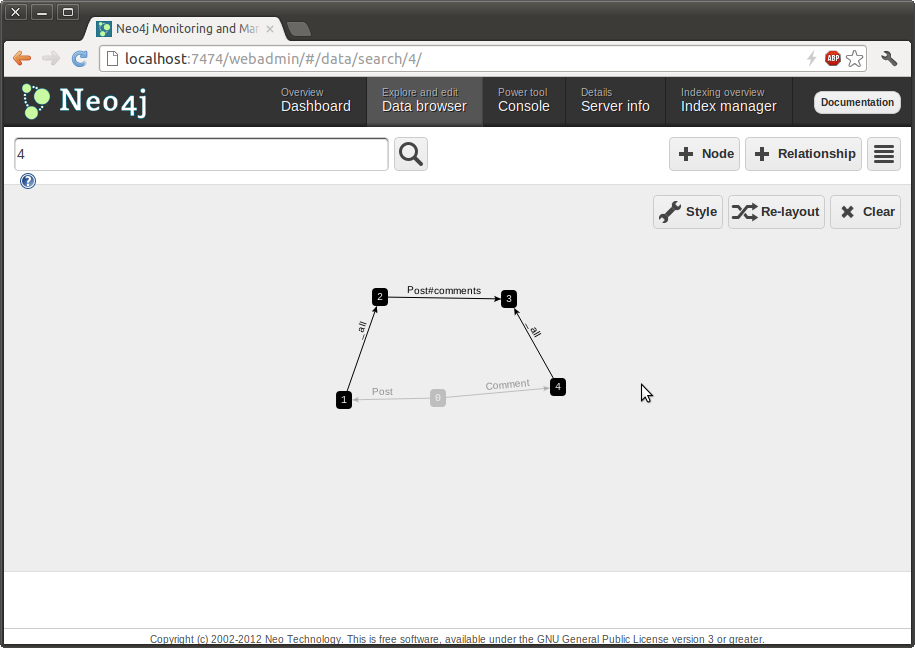
Viewing the Neo4j admin web interface
Neo4j comes with a nice web interface which allows you to query the database and browse through the graph. The neo4j-admin gem will start the web interface on port 7474 once your app is started.
gem 'neo4j-admin', group: :development
Note that I added the gem to the development group, so that it will not start in production. When you now restart your app and access http://localhost:7474 on your browser you will see the Neo4j web interface.
Conclusions
The neo4j gem easily allows you to replace ActiveRecord and use Neo4j as a fast graph-based database backend. The blog application shown in this article does certainly not show a typical use case for graph databases where you store highly interconnected data, but serves as an entry point for further work with Neo4j. There are many ways in which the blog application could be extended to make use of the features that a graph database has to offer, some of which will be discussed in a later article.
Andreas Ronge, the author of the Neo4j gem, has developed a well-tested and feature rich gem which is easy to use. The documentation is not always up to date, but there are enough resources available to help with that.
Other Resources
There are many other resources available that provide additional guidance:
- Neo4j 2.x Documentation
- Neo4j 1.3.1 Documentation
- Paperclip for Neo4j
- Carrierwave for Neo4j
- Devise for Neo4j (only works with Devise 1.x)
- JetStrap, a bootstrap building tool
The gems listed are a little bit dated and require some work to get them set up.