Baking a Pi for Google Go


No that is not a typo in the title! Google Go was first released to the wild in 2009, exactly three years ago. Since then it has grown from an experimental language to production ready language with Go 1.
Go is available on all big platforms and architectures, be it Windows, Linux, MacOS, x86 or ARM. Being a happy owner of the Raspberry Pi, which uses an ARM chip, I tried building Go v1.0.3 and failed.
$ ./make.bash
# Building C bootstrap tool.
cmd/dist

# Building compilers and Go bootstrap tool for host, linux/arm.
lib9
[..]
pkg/go/build
cmd/go
SIGILL: illegal instruction
PC=0x7bfa8

math.init·1()
This error has been fixed in the repository and will very likely make it into Go 1.1. This article describes the steps for building and installing Go from source on the Raspberry Pi.
Preparing your Raspberry
The Raspberry Pi comes with either 256 MB or 512 MB of memory. Compiling and linking the Go compiler can consume over 200 MB of RAM, so if you own the 256 MB version of the Pi, I recommend you adjust the memory split in favor of the main processor, at least while working with Go code. This also applies later when you compile Go programs, so keep that in mind!
The easiest way to adjust the memory split is by using the raspi-config utility:
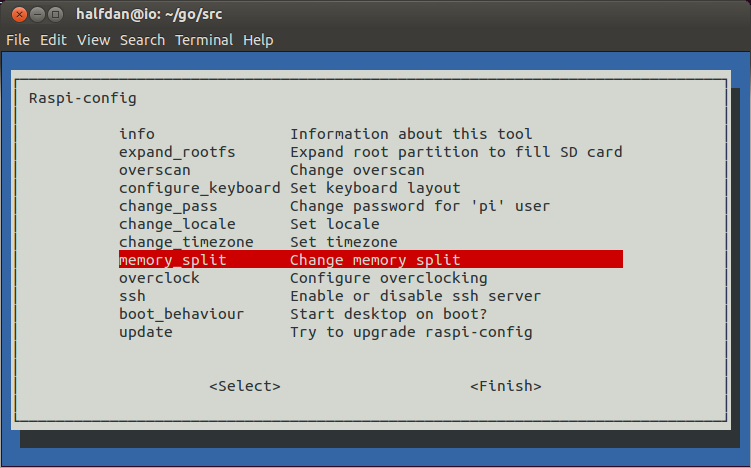
After changing the settings you will have to reboot your Raspberry Pi using sudo shutdown -r now
Installing necessary tools and libraries
Raspbian has all the tools we need available through installable packages. To build Go from source we need Mercurial and a C compiler.
sudo apt-get install -y mercurial gcc libc6-dev
Now that all prerequisites are installed and the Pi is set up, it is time to clone the source and build Go!
Cloning the source
Google Go is hosted on Google Code and uses Mercurial for source code management.
$ hg clone https://code.google.com/p/go/ $HOME/go
This will clone the source into your home directory under the directory go.
Building Go
Go comes with a number of bash scripts that you can use to build the source. The easiest and quickest way is to run the make.bash script in the src directory.
cd $HOME/go/src
./make.bash
This will just compile the source and leave the final binaries in $HOME/go/bin. In case you want to run the full test suite you can either run all.bash (which will build and test Go) or just run test.bash after the initial build.
Adding go to your PATH
To run go directly from the command line you need to add it to the PATH. Add the following line into your .bashrc:
export PATH=$PATH:$HOME/go/bin
Baking the Pi(e)
Go is installed and we can bake the Pi!
$ go run main.go
         (
          )
     __..---..__
 ,-='  /  |  \   =-.
:--..___________..--;
 \.,_____________,./
  Happy Birthday Go!
Lets hope Go is enjoying the cake! It is now up to you to explore the possibilities of having Go installed on the Raspberry Pi. Have a look at the additional resources to get an idea of what is possible with Go and the Raspberry Pi.
package main;

import "fmt"

func main() {
  fmt.Println("         (")
  fmt.Println("          )")
  fmt.Println("     __..---..__")
  fmt.Println(" ,-='  /  |  \\  `=-.")
  fmt.Println(":--..____________..--;")
  fmt.Println(" \\.,_____________,./")
  fmt.Println("  Happy Birthday Go!")
}
Did you already build something great for the Raspberry Pi with Go? Share it in the comments!